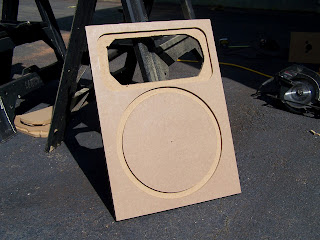
I started off the day by making a new, slightly smaller router base since the waveguide cutouts I was getting from my template were too small. Once that was fixed, I made a jig to align the front baffles underneath the template. Since the template is much larger than the baffle, I needed something to hold it up as I traced it, and also a way to make sure it was properly aligned on the baffle. To do this I took some scrap MDF and made a slot that I could slide the baffle into under the template. This made sure the template was aligned consistently for every cut and that the baffle didn't move. I simply clamped down the open end, and the baffle stayed put as I went to work with the router.
Below is what the baffle looked like after the first pass with the router. I made the recess about 5/16" deep and made sure to do the outline first. Then I went back in and chipped away around the edges until there was enough left over to seat the waveguide.
Next I used a jigsaw to make the rough cutout for the waveguide. It doesn't have to look pretty since the waveguide will cover it, so I made quick, rough cuts.
Once the waveguide holes were made, I got started on making the woofer cutouts. Comparatively these were extremely easy. Since I was using a 1/4" router bit, I had to make three separate passes, each one just smaller than the other to get down to the size where I would make the cutout.
 |
| First pass |
 |
| Third pass |
 |
| Final cutout |
Next up, I cut out some spare Baltic Birch to make some braces. These are 3/4" x 1 1/2", and are enough for all three cabinets. There will be two side to side braces, two front to back, and one top to bottom for each cabinet. After the boxes are complete I'll use a chopsaw to cut them to length and glue them in.
For the rings, I applied some glue, and rather than waste clamping time, I just shot it through with a few screws to hold it down while the glue dried. The glue is more than enough to hold it, but I'll leave the screws in.
Once the holes were drilled, I tapped in the hurricane nuts with a mallet after applying some Gorilla Glue to them. The nuts are supposed to hold themselves in, but I've spun my fair share of them, and it's no fun trying to fix it, so the expanding Gorilla Glue should do the trick. I'll also make sure to chase each one with a tap before trying to mount the drivers.
A row of finished baffles! The front baffle always takes up about 90% of the build time. The waveguide cutouts have 8/32 hurricane nuts, and the woofers have 10/32 nuts.
A quick test fit of the driver and waveguide in the front baffle. Looking good so far!
Clamping up the front and back. It's always a pain to get things aligned correctly, so I made them slightly larger than needed, so I can just trim them up with the flush trim bit and be done with it.


No comments:
Post a Comment