With the electronics on hold for a little while until I can get some components to test crossovers I went ahead with finishing up the cabinets.
The first step was filling in any gaps or blemishes using Bondo. Bondo is usually used for body work on cars, but it works well with MDF too, and I think it's easier to work with than wood filler.
Bondo is a two part mixture, with a base and a hardener. I used a less hardener than instructed so that I would have a longer working time to spread it. I mixed up a small amount and worked it into the gaps with a a putty knife. After about an hour or so, when it was fully hardened, I went back and sanded everything down flush.
It often takes multiple passes with the Bondo to completely fill in large pits or gaps. Just be patient and make as many passes as you need to get a nice smooth finish.
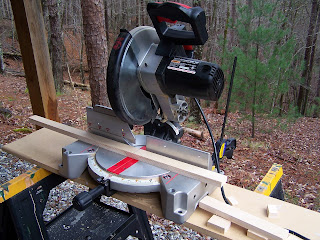
In between coats of Bondo, I got to work finishing up the bracing for the other two cabinets. I used a chop saw to cut my bracing material (leftover 3/4" Baltic Birch from my subwoofer project) slightly larger than the internal width of where they would be bracing. That way they could hold themselves in place for gluing, and securely brace the panels.
Once all the bracing was installed, and the final passes of Bondo were applied, I sanded down each cabinet up to 120 grit to smooth it down, but still give the paint some texture to adhere to. At this point I also knocked down the edges slightly. After cleaning the boxes with a damp cloth and letting them dry, I put on the first coat of primer.
Once the first coat of primer was dry, I used 220 grit sandpaper to smooth down any uneven primer before adding another coat. After the second (and final) coat of primer was applied, I also immediately sprayed some flat black enamel onto the driver cutouts, and the binding post recess in the back. The final topcoat will be rolled on (also flat black enamel), but the spray is easier to get into the tight spaces, and it should blend in fine. In any case, those areas will be mostly covered by the drivers.
The next step is applying the first layer of topcoat. I'm letting the primer dry completely for a couple days before sanding it down and rolling on the topcoat.
Many thanks to Java of the AVS forum for his painting tips and tricks!


No comments:
Post a Comment