 I spent today working on the dual baffles for the subwoofers by trimming away some excess for a better fit, and making the cutouts for the drivers. Above is a picture of the circle jig setup. I just measured from the edge of the router bit to a point on the jig equal to one radius of the hole I was cutting, and drilled a hole for the pivot screw.
Here's the first cut. I tried to do it a little too quickly by setting the router bit a little too deep at first, which made it tough going for the first pass. For the next cuts I made three passes instead of two and the router didn't sound as angry since it didn't have to chew through quite as much wood on each pass (this Baltic Birch is tough). The following picture was taken halfway through the first pass, which is about 1/4" deep.

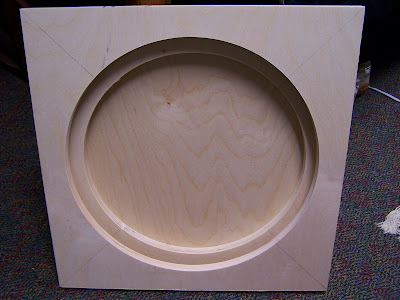
After all of the cuts were made, I was left with a handsome set of double baffles. The inner baffle has a lip for the driver to sit in, and allows for holes to accept screws to hold the driver in. The outer baffle recesses the driver so it sits flush with the outside of the cabinet. Together they add some extra rigidity to the enclosure, so I won't be putting any back to front bracing.
 And below you can see how the driver fits in. The holes came out really well, except for a small bump at the end of the final pass. Since the jig was attached to the part that was getting cut away, it didn't finish perfectly. Thankfully the bumps were pretty small, and a couple minutes with some sandpaper knocked them down flush for a perfect fit.
In the next couple of days I'll drill the holes for the driver screws and insert some hurricane nuts, then I'll glue the double baffles together, and finally start gluing the cabinet together.


No comments:
Post a Comment